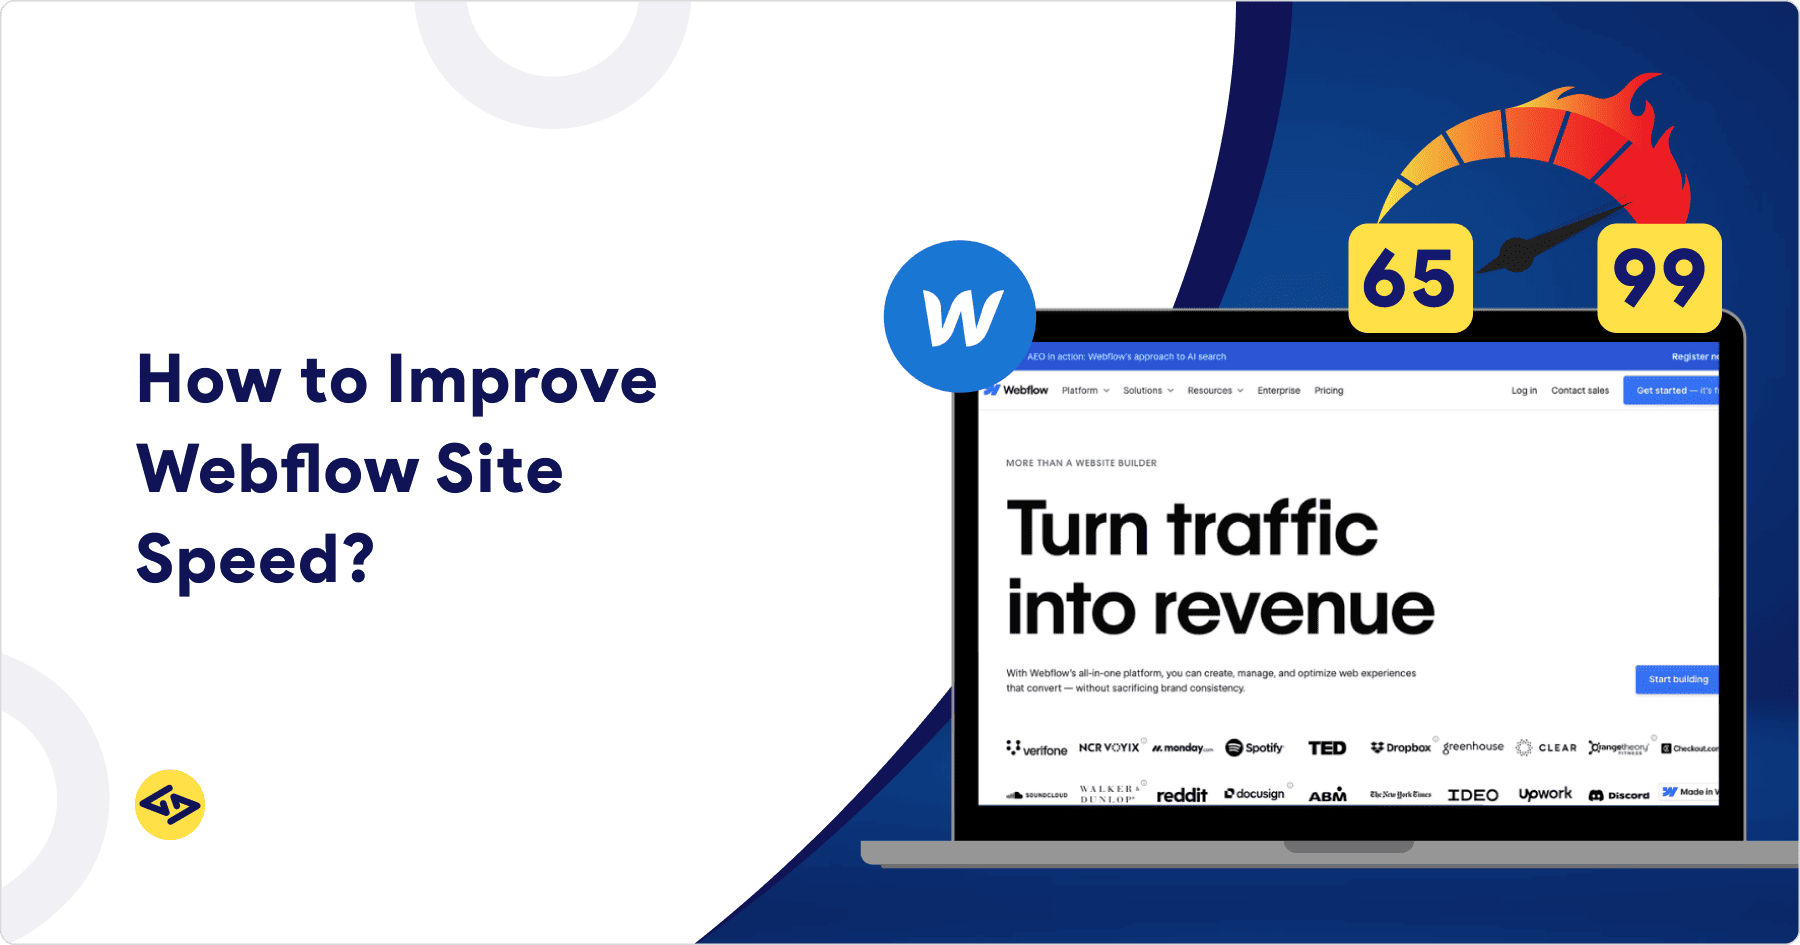
A beautiful website means nothing if it loads slowly. In today’s digital-first world, users expect instant access—especially on mobile. A slow Webflow site doesn’t just frustrate visitors; it silently damages your SEO, spikes bounce rates, and kills conversions. Even the most stunning design can’t perform if it lags.
A 10-second mobile page load time increases bounce rates by 123% compared to a one-second load—a clear reminder that speed isn’t just nice to have; it’s essential. Webflow enables you to create rich and interactive experiences, but that freedom comes with its performance pitfalls. Effective webflow speed optimization is crucial because your site can be slowed significantly by heavy animations, oversized imagery, bloated CMS content, and too many third-party scripts. For many, the choice to use Webflow over other platforms, such as those discussed in our Webflow vs. WordPress comparison, is about getting the best of both design and performance.
This blog will discuss 10 practical tips to make your Webflow site faster—without compromising on design. Whether you’re aiming for:
- Better Core Web Vitals
- A smoother mobile user experience
- Higher conversions
These technical tips will help you maximize the performance and value of your Webflow build. To ensure you have a solid foundation from the start, a professional partner can be invaluable, so consider our dedicated Webflow development services.
Why Speed Should Be Your Top Priority?
Here’s what a faster site gives you:

Better SEO: Faster websites are favored by Google. Speed impacts Core Web Vitals like Largest Contentful Paint (LCP), which measures loading performance, and First Input Delay (FID), which measures interactivity. These metrics directly influence your search rankings.
Lower Bounce Rates: Users leave slow sites quickly. Speed keeps visitors engaged, reducing the chance they’ll abandon your page before it loads.
Higher Conversions: Every second counts. A fast-loading site means users move through your funnel quicker—leading to more signups, purchases, or inquiries.
Improved Mobile UX: Mobile users expect instant access. Speed ensures smooth scrolling, quick taps, and a seamless experience across all screen sizes.
Webflow provides a solid performance foundation, but without a performance-first mindset, even exceptional designs can fall short.
Before You Optimize: What’s Slowing Down Your Webflow Site?
Before starting any Webflow speed optimization, it’s important to understand what is actually slowing down your site. Most Webflow performance issues come from common design and build practices that quietly bloat page load times:
Unoptimized Images: Large, uncompressed images increase load times dramatically.
Too Many Animations: Excessive scrolling triggers, Lottie files, and interactions overload CPUs—especially on mobile.
External Scripts: Third-party embeds (chatbots, analytics, etc.) add external requests and block rendering.
Overloaded CMS Lists: Pulling too many items at once without lazy loading can slow down rendering performance.
CSS Bloat: Unused classes, hidden elements, and excessive styles increase file size and reduce efficiency.
These issues are the key to making your Webflow site faster without sacrificing design.
Technical Checklist: 10 Actionable Ways for Effective Webflow Speed Optimization
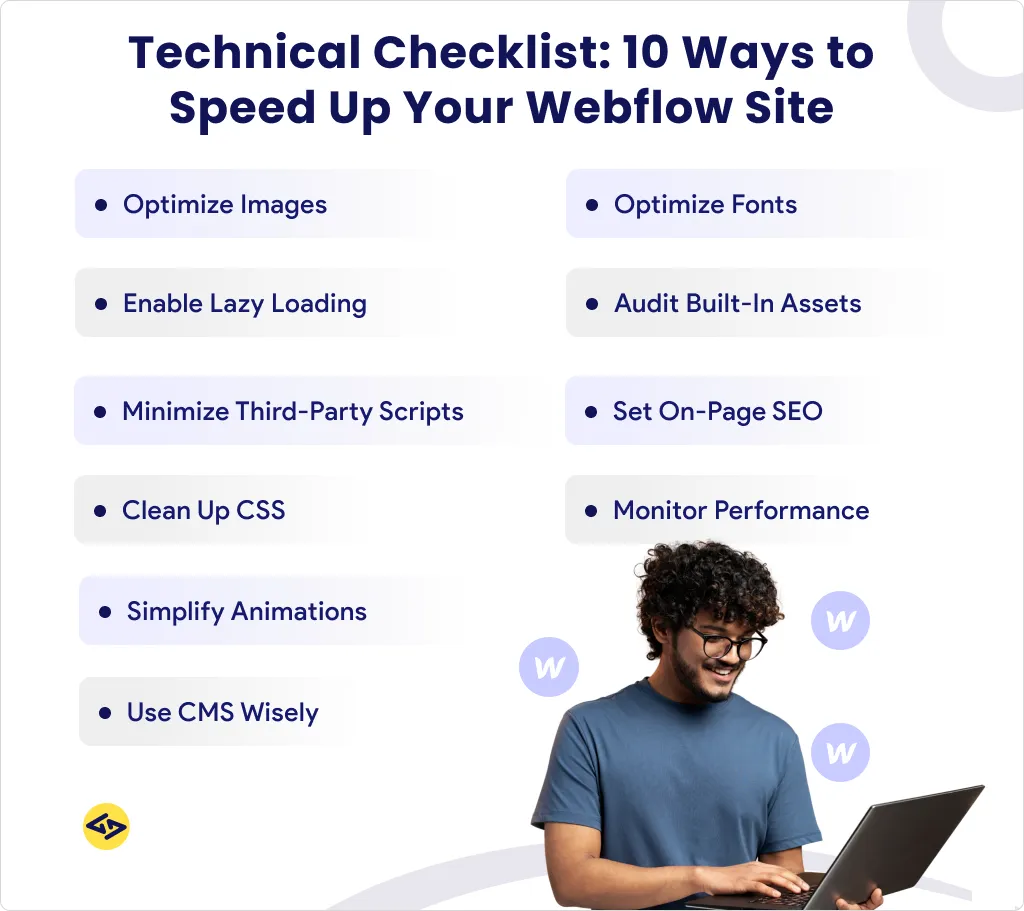
1. Image Optimization
Images often make up the bulk of a webpage’s size, making them the most critical area for optimization. By reducing their file size without compromising quality, you can achieve a massive performance boost.
Compress Before Upload: Never upload an uncompressed image directly from your camera or design software. Use free online tools like TinyPNG or Squoosh to dramatically reduce file size. These tools use smart compression algorithms to remove unnecessary data from the image file while preserving visual quality.
Use Modern Formats: Webflow now supports modern, next-generation image formats like WebP and AVIF. AVIF is a next-generation image format that offers superior compression and quality compared to other formats. These formats offer significantly better compression than older formats like JPEG and PNG, leading to smaller file sizes with similar, or even higher, quality. Use WebP for photos and raster graphics. For icons and vector illustrations, use SVG. SVGs are scalable, have tiny file sizes, and are perfect for a clean, crisp look.
Resize for Display Size: A common mistake is uploading an image that is much larger than its display size. For example, if an image will only be displayed at 400px wide, there’s no reason to upload a 2000px wide file. This forces the user’s browser to download a much larger file and then resize it, wasting bandwidth and processing power.
Tip: Set image width and height in Webflow: Manually setting the width and height attributes in Webflow’s image settings is a simple way to prevent layout shifts. This tells the browser exactly how much space the image will take up before it has even loaded, ensuring your content doesn’t jump around and improving your CLS (Cumulative Layout Shift) score.
2. Enable Lazy Loading
Lazy loading is a powerful technique that improves initial page load time by delaying the loading of images and videos until they are about to become visible on the screen.
Turn on Lazy Load for Media: Webflow makes this incredibly easy. For each image and video element in the Designer, you can simply toggle on “Lazy load” in the settings panel. This is a crucial step for images that are “below the fold,” meaning they aren’t visible when the page first loads.
Prioritize Above-the-Fold: The content at the top of your page—your hero section, for instance—should load as quickly as possible. Avoid lazy loading these critical elements. Doing so ensures the user doesn’t see a blank screen and directly helps with reducing Largest Contentful Paint (LCP) by prioritizing the loading of the largest contentful element.
Reduce Initial Page Weight: By only loading what’s immediately visible to the user, you significantly reduce the initial page weight. For example, lazy loading images on a long scrolling page can cut the initial page size from 10MB to 1MB, resulting in faster page rendering and a quicker Time to Interactive (TTI), making your site feel responsive and snappy.
3. Minimize and Defer Third-Party Scripts
External scripts from analytics tools, chat widgets, and other third-party services can be a major source of render-blocking time, forcing the browser to wait for them to load before rendering your page.
Audit Third-Party Tools: The first step is to perform a thorough audit of your site’s custom code. Remove any unused or outdated widgets, tracking pixels, and embeds. Every script adds a cost, so be ruthless in removing what isn’t essential.
Defer or Async Scripts: When you add a custom script, use the async or defer attributes. async allows the script to be downloaded in the background and executed as soon as it’s ready, while defer downloads it in the background but waits until the entire page is parsed before executing. For most non-critical scripts, defer is the safest option.
Use a Tag Manager: For sites with multiple scripts, a tag manager like Google Tag Manager (GTM) is invaluable. You can consolidate all of your scripts into GTM and manage them from a single dashboard. This allows you to set specific triggers for when scripts should fire (e.g., after the page has loaded), preventing them from blocking the initial page render.
4. Clean Up Unused CSS and Styles
As you design and redesign pages, your project can accumulate a lot of unused classes and styles, which increases the size of your CSS file and can slightly slow down rendering.
Use Webflow’s Style Manager: Webflow has a powerful built-in tool for this. Navigate to the Styles panel (the paintbrush icon) and click the “Style Manager” button. From here, you can see a list of all your classes and easily delete any that aren’t being used on any element. This is a key step in cleaning up unused CSS in Webflow.
Merge Repeated Styles: Be intentional with your class names. If you find yourself creating a new class with the same styling as an old one, simply reuse the existing class. For slight variations, use combo classes (a class applied to an element in addition to its base class). This keeps your design system consistent and your stylesheet lean.
Limit Inline Styling: Avoid applying styles directly to an element in the designer without giving it a class. This creates unnecessary inline code. Instead, always use a class or a combo class for all styling.
5. Simplify Animations and Interactions
Webflow’s Interactions panel is one of its most compelling features, but too much of a good thing can harm performance. Complex or continuously running animations can tax the browser and lead to a poor user experience.
Limit Scroll Animations: Scroll-based animations are particularly resource-intensive because the browser has to constantly track the user’s scroll position and recalculate element positions. Use them sparingly and only for simple effects.
Use CSS Transitions Instead of JavaScript: For basic hover effects and transitions, use the CSS transition features in the Webflow Style Panel. These are GPU-accelerated and far more performant than complex interactions that rely on JavaScript. This is the best practice for how to fix slow Webflow animations.
Test on Mobile: The performance of an animation can vary dramatically between a powerful desktop computer and a mobile phone. Always test your animations on a real mobile device to ensure they don’t cause lag or stuttering.
6. Use CMS Collections Wisely
The Webflow CMS is a powerful tool, but displaying too many items on a single page can cause significant performance issues.
Paginate Lists: For large collections, the best practice is to use pagination. Webflow allows you to set a limit on the number of items per page. This breaks a huge list into smaller, more manageable, and faster-loading pages. An ideal number of items per page is typically between 10 and 20.
Use Filters Smartly: Instead of loading all collection items at once, use filters to show only a subset of items initially. The user can then interact with the filters to load other items as needed.
Avoid Nested Collections on Load: Nested CMS collections can be a major performance drain, especially within a large collection list. Each nested collection triggers multiple extra processing steps. If you must use nested collections, consider if you can simplify the structure or use separate pages for the content.
7. Optimize Font Usage
Custom fonts are a key part of your brand identity, but they can be a significant part of your page’s total file size.
Limit Font Families and Weights: Every custom font family you use adds an external request, and every weight you select (e.g., Light, Regular, Bold) is a separate font file that must be downloaded. Stick to one or two font families and only load the specific weights you need.
Use System Fonts When Possible: Using a System font such as Arial or Helvetica, which the user already has on their computer, will load immediately. So, consider sticking with a system font on body text, but using a custom font just on headings.
Host Fonts Locally: It is convenient to use web font services such as Google Fonts, but by downloading the fonts and hosting them directly on your Webflow project, you may occasionally find improved performance. This saves an external DNS lookup, and the fonts are hosted on the same server as your site.
8. Audit Webflow’s Built-In Assets
As time goes on, your Webflow project might fill up with orphaned design components that are not needed to build the end HTML and CSS files.
Remove Hidden Elements: You might have an old section or element that you simply hid using display: none. While invisible, this content still exists in the HTML and adds weight to your page. Go through your project and delete any content that is no longer needed.
Simplify Symbols: Symbols are excellent for reusable elements; however, when only a symbol is needed once, the process of unlinking and using an otherwise clean div block may be more efficient. This avoids the unwanted generation of code.
Optimize Page Structure: This is where the Webflow Page Structuring Navigator panel is your best friend. It gives you the structure of your page. Avoid deep structure and minimal nested div blocks. The browser can render a simpler Document Object Model (DOM) faster and easier.
9. Set On-Page SEO and Meta Settings
While these settings don’t directly impact technical speed, they are crucial for a great user experience and for how search engines and social media platforms perceive your site. This will influence the perceived performance of your site and click-throughs.
Meta Titles and Descriptions: The Meta Titles and Descriptions can be edited on any page in Webflow Page Settings. It is expected that an appealing title and description will result in a better click-through rate, indicating to Google that your page is worthy of its attention.
Open Graph Settings: Enter your Open Graph (OG) title, descriptions, and image. This is what is shown when you share your page on a social networking site. With a professionally made OG card, your link looks more interesting and professional.
Image Alt Text: Describe each image with descriptive text. This is a core accessibility best practice for screen readers and also aids search engines in understanding what your images are about, which improves image SEO. For more detailed advice on this topic, be sure to check out our blog post on Webflow SEO tips.
10. Monitor with Core Web Vitals Tools
You can’t improve it if you don’t track it. The only way to detect problems and check the effectiveness of your optimizations is to monitor the performance of your site regularly. This continuous effort is crucial, and it’s why understanding the importance of Webflow maintenance is so vital for long-term success.
Google PageSpeed Insights: It is the essential tool to learn about the performance of your site. It gives you a full report of your Core Web Vitals ranking and helpful suggestions. Going through this is the official method of verifying core web vitals in Webflow.
Audits Lighthouse: Available directly inside Chrome via the Developer Tools, Lighthouse lets you run an ad hoc audit of your local site. It is an excellent opportunity to preview modifications on your site before publishing them.
Webflow Audit Panel: Webflow has an inbuilt audit panel that can allow you to find some quick wins, such as missing alt text and broken links, related to basic SEO and accessibility.
If you are looking to get professional help with ongoing performance, our team offers specialized Webflow maintenance services to keep your site running at peak efficiency. To learn more about working with experts, our article on how to hire Webflow developers is a great place to start.
Conclusion: Fast Sites Win—Always
Speed is no longer optional—it’s an essential component of a successful website. Faster Webflow sites outrank the search engines, boosting organic traffic, providing an improved experience across all devices, and converting more users by building trust and reducing friction. Although Webflow offers a robust and blazing-fast platform, staying at the top demands careful effort and consistent observation. These 10 steps will lead to a leaner, faster, more effective website.
Make Your Webflow Site Lightning Fast
Follow our top webflow speed optimization tips and give your visitors a seamless, fast-loading experience.